Have you ever thought about building a Gundam model or bought one only to find it sitting on your shelf? Inside a kit box you will find a dizzying amount of pieces with instructions in a crazy language, but that doesn’t mean they’re difficult to build. In this article we lay out each step and give helpful tips along the way to make your model building experience a lot of fun!

In this article you find useful information on:
Phase 0: Setting Up Your Workspace and Preparing Your Gunpla Kit
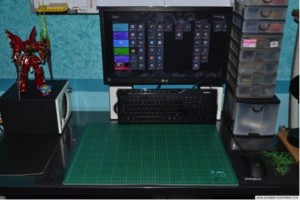
Before you start building Gunpla, the first thing to do is prepare a suitable workspace like the one below. While it’s not required to have a cutting mat on your workspace, it is recommended so that you do not damage the surface of your worktable. It’s better to have your Gunpla workspace organized so that you won’t lose parts or throw them by accident in the trash bin while cleaning up.
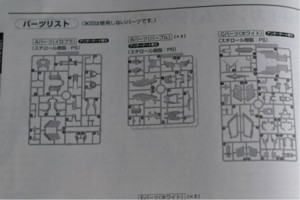
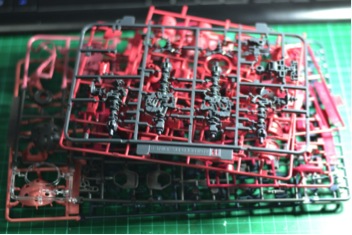
The next thing to do is to become more familiar with your kit by taking out the runners where the parts are and taking a look at the instruction booklet. On the first few pages of the instruction booklet you will find a visual list of the runners and their respective parts with corresponding letter designation. You can cross check your runners in the box with this list so that you’ll be sure that your runners are complete.
You can then arrange the runners in alphabetical order. A good tip is to lay them inside the box so that when you need a runner that contains a specific part, it will be easier to access it.
Now the instructions are in Japanese, but don’t worry, the visual diagrams are very straight forward and easy to understand. Here are translations of some of the most common symbols that can be found in your Gunpla instruction booklet:
 Sticker number/Japanese letter
 Decal number/letter
 Parts indicated will be connected/installed on both opposite sides.
 The same part will be connected/installed on the opposite side.
 Pay close attention to the position or orientation of the part indicated to be connected/installed.
 Do not tighten too much for parts to be screwed.
 Part to be cut from the runner/gates.
 Step should be repeated twice to build the same kind of part. Sometimes this can be more than twice depending on the part.
 Connect/install this part first before connecting/installing the other parts.
 Connect/install this part after all other parts have been connected/installed.
 Part will be rotated 180 degrees opposite from its original position.
 Your decision to choose which part to connect/install. This usually indicates that there is more than one part variant that can be installed or used in a part to be built.
 Opposite side can also be moved similarly.
Now that you’ve familiarized yourself with the instructions and the runners, you can start cutting the parts from the runners and building them into your model.
Phase 1: Cutting Out and Piecing Together Parts
First, here are the recommended tools for cutting and building Gunpla pieces.
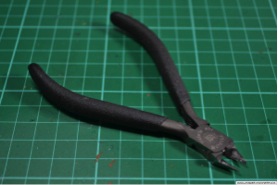
Tamiya Craft Tools no. 35 Side Cutters
These are one of the best side cutters for Gunpla, it cuts plastic like butter, great for cleaning out nib marks because stress on the plastic piece is reduced die to the high quality design and sharpness of the side cutters.
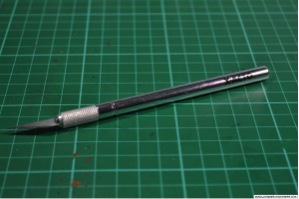
X-Acto Hobby Knife
This is for further cleaning of nib marks. Be careful when using this tool because the blade is really sharp!
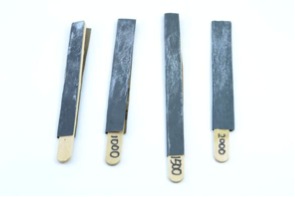
Sandpaper Sticks
These are used for sanding the parts after nib removal for an extra smooth finish. You can make your own with just some Popsicle sticks and sandpaper that have been cut to size. You can see in the image that the grit size has also been written on the stick for easy reference.
Making the Pieces Fit
Parts to be cut are indicated on the instruction booklet that is denoted by a letter of the runner and the number of the part. Assembling them is pretty straightforward most of the time and can be easily understood based from the clear diagrams. When the part doesn’t fit to another part; do not force them together; it usually means you have the wrong part or are installing it in the wrong direction. If that’s the case, review the diagram and try to find the proper orientation of installation.
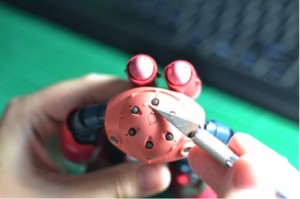
In cutting the parts, do not cut right on the edge of the part. Cut away from the edge, leaving a few millimetres of plastic on the part, and then begin to remove the excess plastic little by little. This will avoid the creation of white stress marks that can be left when you cut as close to the piece as possible.
You can also use your X-Acto knife in cleaning the nib marks further.
If you’re still not satisfied you smooth it further by using different grits of sandpaper. First use a low grit number to even out the surface like 800 grit sandpaper. Then increase the grit number to smoothen the surface. Do this for all of the parts to have a nice clean look on your built Gunpla. Goodbye pesky nib marks!
Phase 2: Panel Lining Done Easily
First, here are the tools you will need to make panel lining a breeze.
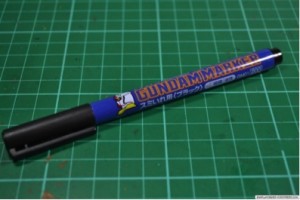
Gundam marker or COPIC Multiliner
Gundam markers come in different colors like grey and brown, though black is the standby color for most models. COPIC Multiliner inking pens can be a good an alternative as a panel lining tool.
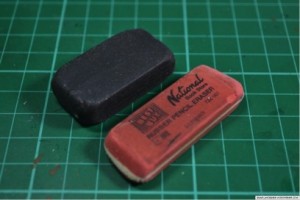
Rubber Eraser
This is used to clean excess ink from the part especially if you want your piece to look spotless.
Creating Satisfying Panel Lining
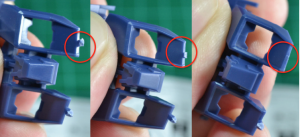
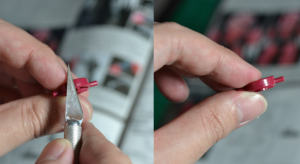
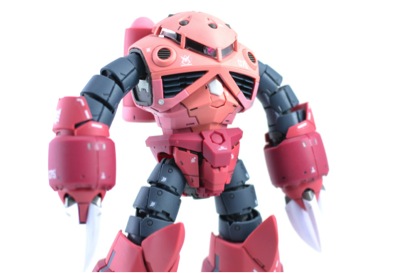
Using the model piece below, we explain of how to easily create panel lining on each piece.
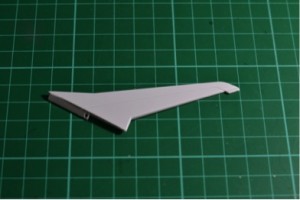
Carefully run your panel lining pen through the piece’s the creases; don’t worry about excess ink or lines that go beyond the panel line, because you can clean remove later using the rubber erasers.
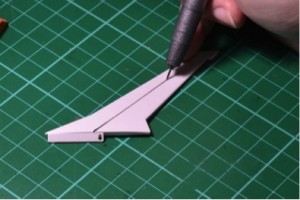
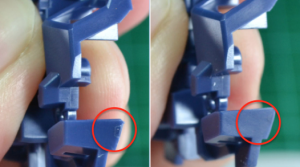
As you can see in this example, the line is a bit thick and there is a slight excess of ink around the bottom of the piece. You can easily clean that by rubbing the eraser perpendicular to the panel lines.
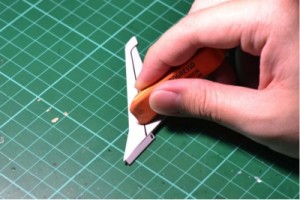
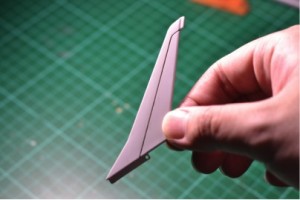
After blowing off the eraser dust, viola! It’s now cleaner and thinner! It’s that easy to apply panel lining to make your model look even more realistic. Gundam COPIC Multiliner markers do not dry quickly, which allows for easily correction after a mistake. Just be sure to have a rubber eraser prepared for cleaning.
Take your skills to the next level with our detailed Gunpla Panel Lining Guide!
Phase 3: Applying Decal Stickers to RG and MG Gundam Models
Decals that come with RG kits and MG kits play a vital role in making your Gunpla look more realistic, so don’t be intimidated by the sheer number of stickers that come with the the kits especially RG and MG ver KA kits. They are not that hard to apply as long as you use the proper methods in applying decal stickers. And as a side note, they do provide some extra decal stickers so not everything in the sheet will be used if you follow the decal instructions in the instruction booklet.
Application of decal stickers guide can be usually found near the end of the instructions booklet or at the back. You just have to follow the number and/or letters of the decal stickers to be used on a certain part of the Gunpla model as can be shown on the diagram of the instruction booklet.
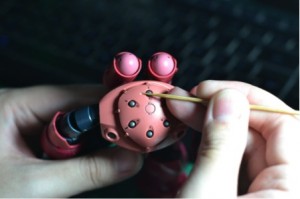
You can use tweezers or a hobby knife in lifting up the sticker from the sheet, but in using a blade be careful not to tear the sticker. I prefer using a hobby knife because it is easier to control and easier to lay down the decal sticker on the model surface.
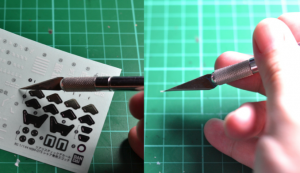
You can also use a toothpick for laying the decal sticker in place and pushing out the air bubbles under clear decals to obtain a clean look.
Learn how to master dry transfer and water slide decals with our in-depth Gunpla Decal Tutorial!
Phase 4: Topcoating Options to Make Your Gundam Stand Out
Top coating is the last step in this basic Gunpla building process. Top coating protects your Gunpla and seals in the decal stickers so that they won’t easily come off through time. There are two main finishes of Topcoat, which are gloss and matte.
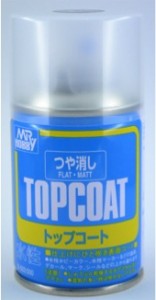
The choice between the two really comes down to personal preference. The advantages of matte Topcoat spray is that it can make scratches and sandpaper marks on the plastic surface disappear. The reason behind this is because the matte Topcoat spray makes the surface of the Gunpla plastic rough at the micro level thus reflecting less light. Gloss finishes are more suitable to metallic finished Gunplas to show off the metallic shine.
When Topcoating your Gunpla model, it’s recommended to do this outdoors and in nice sunny warm weather because Topcoat spray fumes can be toxic and unpleasant when done indoors. You don’t have to disassemble your Gunpla model and spray each part separately. Simply spread the arms and legs out as far as possible so that the spray will cover them. It’s best to spray around 30 centimeters (1 foot) away from the model to prevent too much coating on the model, which will cause dripping or bubbling. Spray the whole model in multiple light thin coats waiting a few minutes in between coats to dry and to achieve maximum effect. On average 3–5 coats should be adequate.
More Tips on Topcoating
- Always shake the can before each spray.
- You can dip the can in warm water first before spraying so that the particles will be finer during spraying.
- Do not make the starting point of your spraying on the Gunpla model itself, start on an empty space beside the model and work your way through the Gunpla model spraying sideways and stopping past the Gunpla model, again do not stop on the model itself.
- Topcoating can fog clear parts, if you do not want this effect, you can just remove the clear parts beforehand.
We’ve got even more tips in our Gunpla Topcoating Guide!
And that’s it! Now you’ve built a beautiful Gunpla model! It’s very easy and fun to do! This is a basic guide for building your first Gundam model and there is a wealth of resources online for more experienced builders. If you have any tips you’ve found while building Gunpla share them with us in the comments below.
And be sure to check out our series of Gunpla How-to Guides below!
- How to Choose the Right Gundam Model Kit
- The Gunpla Kit Painting Guide for Realistic Models
- The Gunpla Tutorial: How to Decal your Gundam Plastic Model
- The Gunpla Top Coat Guide: Giving your Gunpla a Fantastic Finish
- The Gunpla Panel Lining Guide: Gunpla’s Guide to Markers and Paints
- The Gunpla Weathering Guide: Creating Realistic Battle Damage


